Kernel Installation
This page describes a simple workflow to prepare dependencies, configure the RAMOS kernel, build it, and install it inside the guest image.
Get Source Code
git clone https://github.com/ramryder-project/ramos.git
cd ramos
Prepare
Install the required build dependencies first.
Run all remaining commands in the kernel source tree:
sudo apt-get update
sudo apt-get install build-essential libncurses5 libncurses5-dev bin86 kernel-package libssl-dev bison flex libelf-dev dwarves
Configure Kernel
Start from the current system configuration:
cp /boot/config-$(uname -r) .config
make olddefconfig
Then open the configuration menu:
make menuconfig
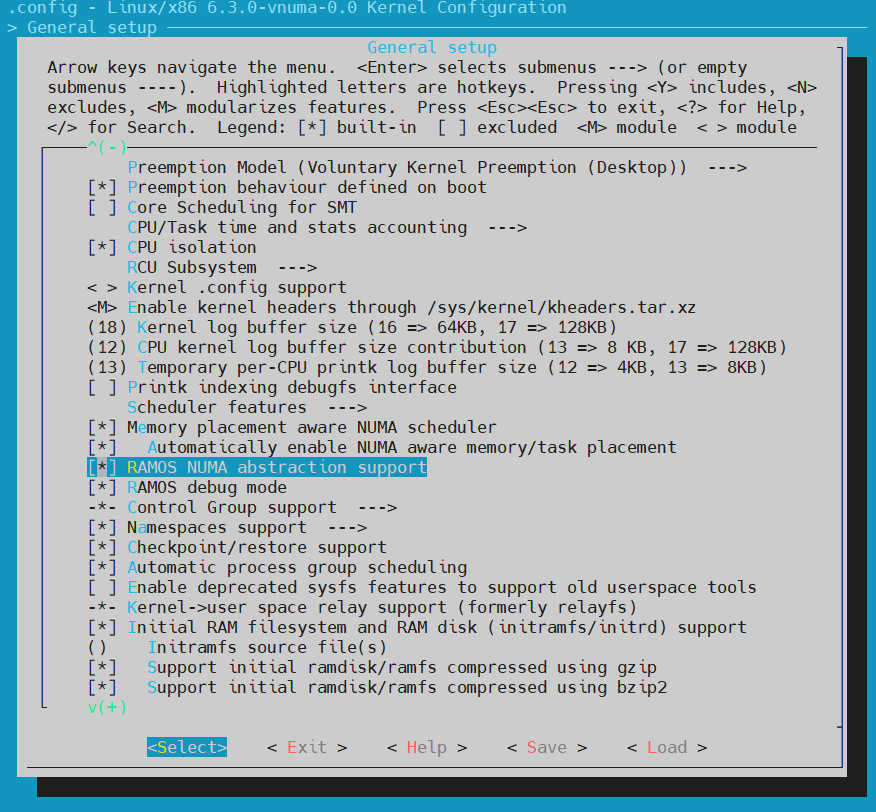
In make menuconfig, enable the following RAMOS options under General setup:
RAMOS NUMA abstraction supportRAMOS debug mode(optional, for more verbose log output)
Reference example:
Build and Install
Use the following commands for a full kernel build and installation:
make -j$(nproc)
make -j$(nproc) modules
sudo make INSTALL_MOD_STRIP=1 modules_install
sudo make install
Then reboot the VM and select new kernel Linux 6.3.0-ramos+.
Note that INSTALL_MOD_STRIP=1 removes debug symbols from kernel modules. This
reduces build time and saves storage space, but you may want to keep debug
symbols if you plan to use gdb.
Boot Updates
These steps are optional because make install already handles the required
boot updates in most cases. The commands below are kept here for reference in
case the new kernel does not appear after reboot.
update-initramfs -c -k [kernel version full name]
update-grub